RTT Install Guide
WHEN YOUR TENT ARRIVES TO YOU
- Using caution, unbox the rooftop tent by removing the pallet straps the tent box is fixed to the pallet with along with the straps the tent box is secured shut with. Do not use scissors or box cutters on the cardboard box as it could result in inadvertently scracthing the tent.
- Remove protective film on the tent and remove the foam from the box. once you do this you can remove the tent from the box and it is ready to install.
INSTALLING YOUR TENT
- We highly suggest having a friend there to help and that together you’re both able to lift at least 200lbs.
- If you are installing the tent onto a vehicle with low profile OEM crossbars, we highly suggest adding a layer of rubber between the crossbars and the tent rails to increase clearance and reduce vibration. These can be purchased HERE.
- Locate your mounting hardware. The mounting kit comes in its own small box which is placed either inside the tents shipping box, inside the tent itself or inside the ladder box.
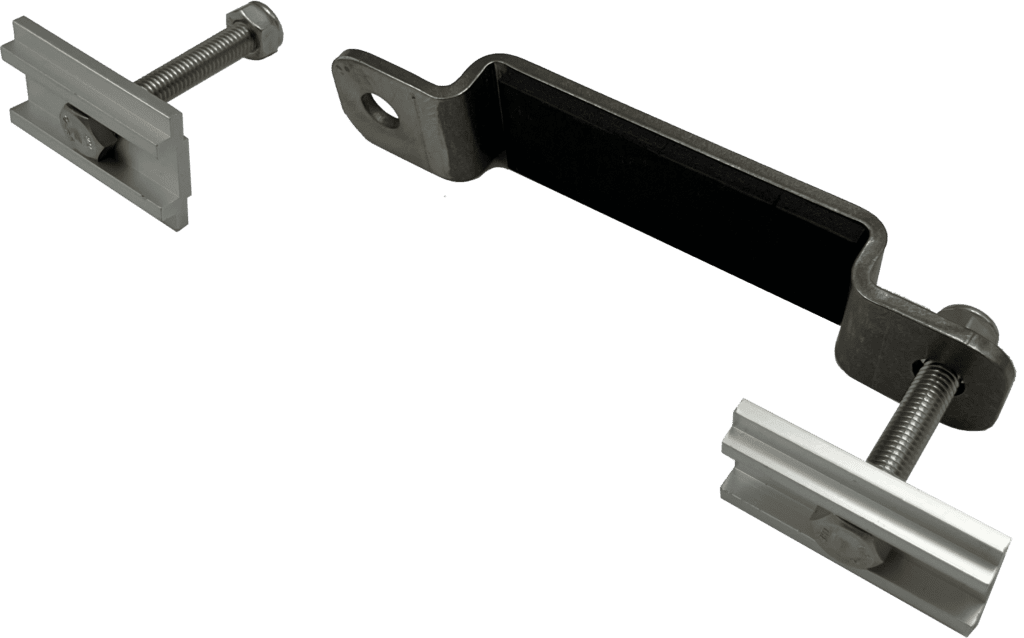
- Assemble four (4) mounting hardware sets like the picture below:
- Grab your friend and lift the tent onto your crossbars. No need to center it just yet!
- On both sides of the tent, slide in the single mounting bracket/bolt without the bracket like the picture below.
- Once all four of these are in, lift one side of the tent high enough to slide the mounting bolt past the crossbar so it is on the inside of or between the two crossbars. Repeat the same step on the other side of the tent.
- Next you will take the mounting bolt with the bracket and slide it into the tracks on both sides of the tent. Place the inside bolt through the open side of the bracket and add the locking nut back on.
- Now is the time to center or place the tent to your liking. For the perfect fit use a measuring tape and measure the distance from the rail to the end of the rack and adjust accordingly so you have the same measurement on each side.
- Once your tent is centered and you ensure it clears any rear hatch doors (if applicable), use the supplied 13mm ratcheting wrench and slowly tighten the locking nuts. Doing this process too fast or using air/electric tools can cause the bolt and nut to heat up and seize. We also highly recommend applying anti-seize for this step.
**After driving 30 miles, recheck all of your mounting hardware to ensure it is still tight. We also suggest to do this process monthly, after every time you offroad and use a torque marker for easy inspection.